I just wanted to let you know about a One Day Only Washi Tape Sale today! Stampin' UP! is celebrating a milestone of hits to their blog, and EVERY THURSDAY in October, you will be a new item on sale for the day. This is the first offering. I love Washi tape, if you haven't tried it yet, now is a great time. But act quick, its today only and the day is half over :)
Contact me with any questions! And don't forget to use the new Hostess Code to get your frequent buyer rewards.

Thursday, October 3, 2013
WHOOOO will owl be next?


The Ghost was fun, I used vellum to make him look see through.

I rounded the top of a rectangle with the large oval punch. I pushed the vellum through the back of the punch, leaving half out of the punch. Next I used the Scallop oval punch to make the wavy bottom of the Ghost costume, also going through the back and leaving the rounded top out of the punch.


I laid the costume over the owl to mark where to punch out the eyes.

The cape on Super Owl was made the same way, only with the top of the scallop oval punch. .


This little devil was probably the easiest. Simple punch out a red owl. Cut off the feet Cut off the ears and then flip them and glue them back on as horns. To make the tail, put your red paper back into the punch, move it over the punched out body, then bump it slightly over...

Add the heart to the tip of the tail and your done.
What will you do with your punches?

You can never have too many punches!!
Tuesday, October 1, 2013
Witches Broom


First I started with a piece of 5 1/2 by 2 1/4 cardstock in Crumb Cake, score at 1/2 inch.


I sponged the cardstock a bit, then cut fringes into the bottom, up to the score line.


I used some retired black thread to tie around the broom. Bakers twine or linen thread would work great too.


On this one I used a mask to add a sponged moon behind the witch.


This hat is from the Best of Halloween stamp set.

Candy Corn and Pencils work great too!
Thanks for stopping by!
Monday, September 30, 2013
Last Day of the Butterfly Bundle
.jpg)
.jpg)
.jpg)
.jpg)

even the little bat was made with the butterfly bundle.

Get 15% when you buy both the Papillion Potpourri stamp set and Bitty Butterfly Punch together as a bundle! Be sure to use the item number for the bundle.
Monday, September 23, 2013
I have a My Digital Studio post for you today!

I used the Fan Fair download for the papers and embellishments on this page. I've used it before in a lot of pages I make of my mom, I'm hoping to put them together in a book, someday! There are just too many pages I want to put in there, I may never get done! I used the Sketch from MDS Monday to make this page. Some of my regular readers know that I am part of the challenge team over at MDS Monday, but some of you may not, so I like to let my paper readers know every once and a while. And, if you haven't tried digital scrapbooking before, why not give it a try? I am happy to help, and there are numerous places to get online help as well, such as my "Beth's digital cuts" blog, the MDS Monday blog, and the MyDigitalStudio.net site.
Here I the sketch, it would be great for you paper scrappers too!

Thanks for stopping by!!
Monday, September 16, 2013
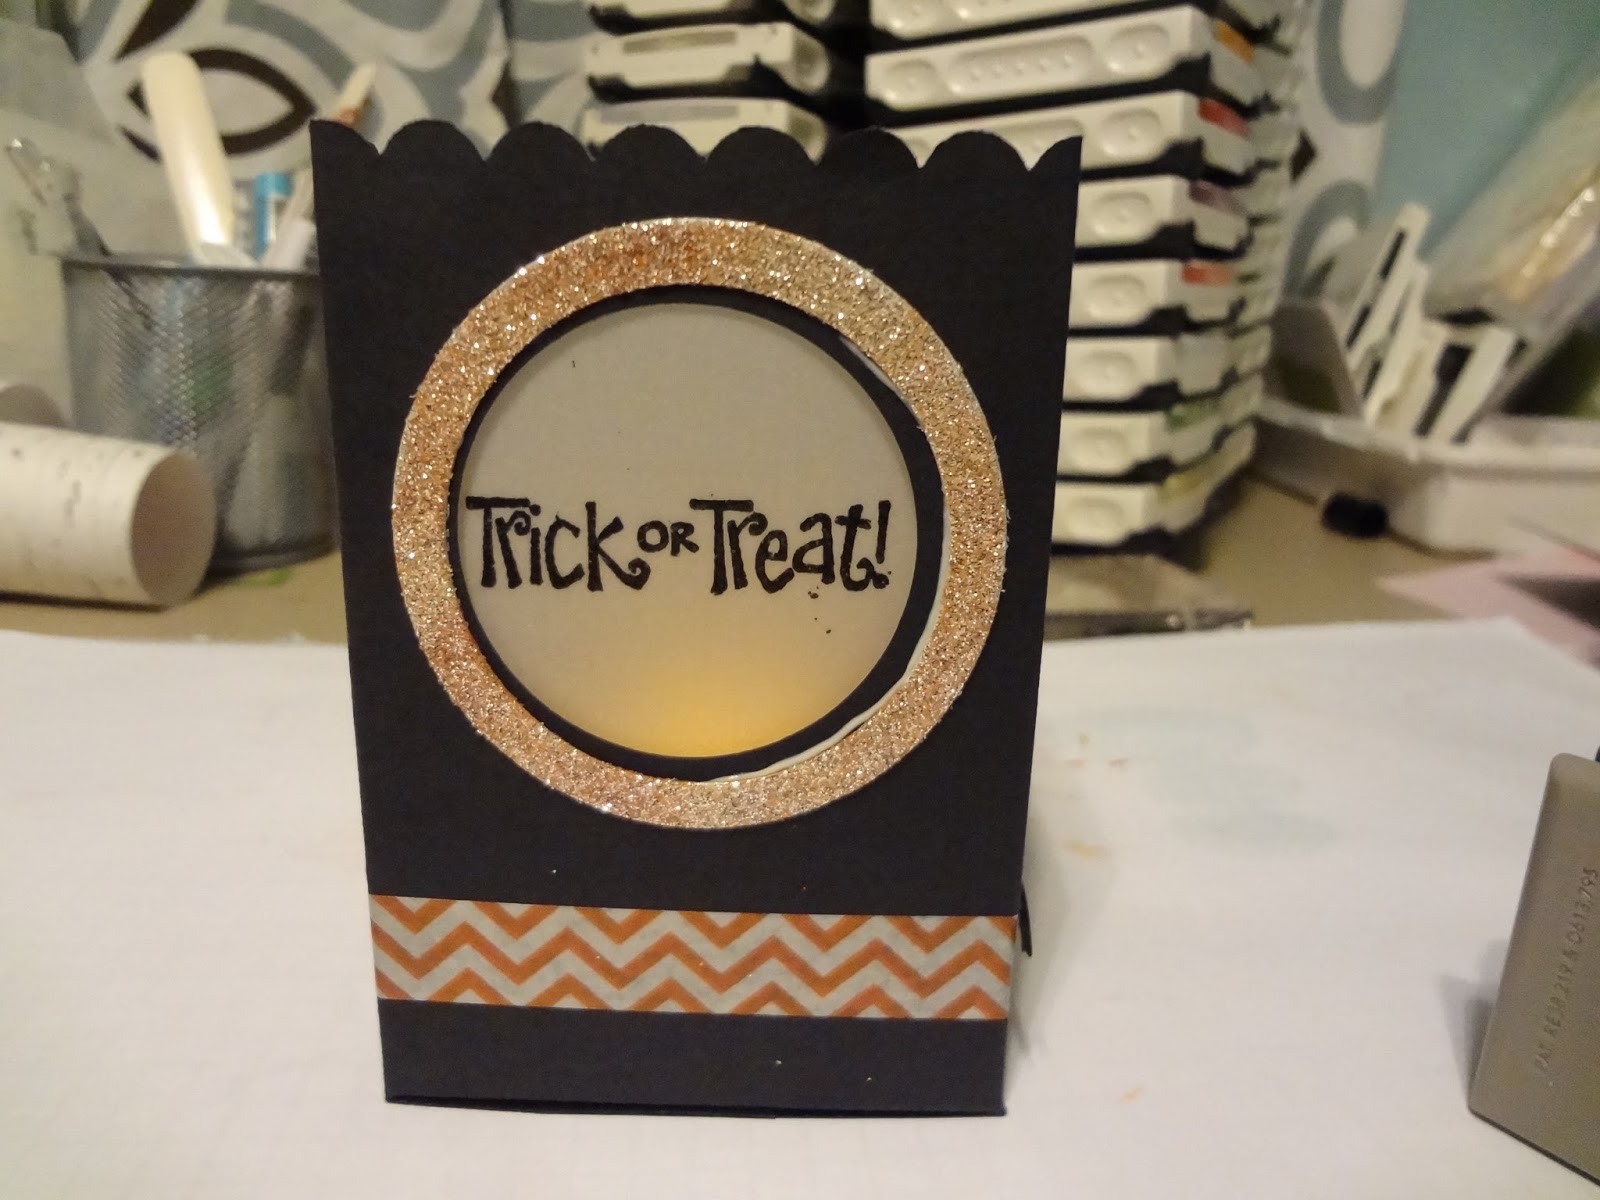
Spooky Luminary

 Where did I get the orange glimmer paper? did I actually use non-Stampin' Up! products? No way! I used silver glimmer paper which I them painted with some re-inker and my aqua painters.
 I cut the circles out with my circles dies, then used the re-inker on them. They did dry a little lighter than I wanted so when I make them again I will do two coats.


Then I used my gel pen to add some eyes.

Here is a picture of it glowing in the dark. Fun right?

Score at 2 3/4, 5 1/2, 8 1/4, 11.
Turn and score at 1 3/4.
cut the flaps, completely cut off the tiny rectangle at the bottom.



Best of Halloween stamp set item # 134381 $14.95
Thanks for stopping by! Friday, September 13, 2013
Hostess Code
The current Hostess code for my online order frequent buyers is 2VWFZCHT.
See this post for more information on the Hostess code and how it can help you earn Stampin' Up! products! This code will expire September 21st. Look for a new Hostess code with the next Stamp Camp dates.
Scroll Down for current post
See this post for more information on the Hostess code and how it can help you earn Stampin' Up! products! This code will expire September 21st. Look for a new Hostess code with the next Stamp Camp dates.
Scroll Down for current post
Subscribe to:
Posts (Atom)