As we say Hello to the new Annual Catalog, we have to say goodbye to some retiring products. There are so many products leaving us because we have a new Annual Catalog, Retiring Mini Catalog, and a Big Color Refresh. The Color Refresh effects bundles like Markers, Watercolor Pencils, Pastels, and Paper Packs. So many items retiring and so many new items coming in means that Stampin' Up! needs to make room in the warehouse! And that means sale prices!! YAY! There are some really great deals to be had.
Prices go into effect on April 4th. If you are looking at retiring colors, particularly ink, you may want to get those right away. I would say that if they are not discounted, might as well get them now before April 4th to be sure to get them. Items with larger discounts probably means that they have a decent supply, but if there is no discount, they those items are probably close to selling out. That should help you decide how quickly you need to act :) I edited the Excel sheets to eliminate the sets in French, since most of my customers buy the English sets, so if you are looking for French Sets, let me know and I can give you the longer list. I also edited the list to highlight the items that have a discount. Feel free to let me know if you have any questions!
Hi Everyone! Today I wanted to show how to make some Easter Treat Baskets. I used a very simple "2,4,6" template on both, but I changed them up a little to get two different basket looks. Which do you like? Here they are with an added tag for decoration.
To make the tag I used the Decorative Circle punch in white, then punched again with a strip of Designer Series Paper from the Regency Park Pack to get the bottom edge only. I then added a bunny punched from the Country Gingham Designer Series Paper Pack.
As of today as I post this, the Bunny Punch is on backorder :( however the stamp is not and you can use the stamp to add a bunny or even just stamp the bunny on gingham paper and cut it out by hand.
For this version, I decorated the sides with panels of cardstock embossed with the Cane Weave 3D Embossing folder.
You can see how to make both of these versions in my video below.
The Ginkgo Branch stamp set from Stampin' Up! is just beautiful and the dies just push it right over the top. I was attracted to it right away when I saw the set in the January to June mini catalog.
I decided to pair the stamp up with some pretty specialty papers. I used the Distressed Gold and Vellum Layering papers.
To give the Ginkgo Die cut more dimension, I used my Water Painter to add Pear Pizzazz ink to the Soft Sea Foam cut out.
For some added texture I tore the edges of the paper layers.
You can see a full how to for this card on my YouTube channel.
I continued the tearing on the inside of the card and stamped a smaller Ginkgo in Pear Pizzazz.
The sentiments included with this stamp set are very nice and I love that the die set includes a label die for them.
Take a look at these gorgeous samples from the catalog.
If you don't already have a demonstrator, I would love to be yours! Contact me with any questions via my Stampin' Up! site: https://bethrush.stampinup.net/
Today I want to share some cards I made using my Blender Pens. I thought I would show a few different ways that you can use the pens.
If you are unfamiliar with Blender Pens, they are a clear marker type pen, filled with some sort of solvent solution that blends ink. It's important to note that Stampin' Up! Blender Pens are acid free and xylene free, unlike other pens on the market. Yay! They are sold in a set of 3 for $12 (as of March 2023). They are dual tip pens, both ends the same, giving you 6 pen tips for $12 or $2 each! You can use them with many mediums, ink, watercolor pencil, pastels, to sort of paint with. One benefit is that if you can a set of blender pens, it's like having a marker in all the colors of you ink pad collection. As you use the Blender Pens, you simple swipe away any remaining ink or color left on the pen tip on a scrap of paper and then you are free to use the pen again with another color. I usually just take one pen out of the box and use it until I dries, well longer than a year. Some people like to designate pens for certain colors, a reds pen, a blues pen, etc. I made a video to show how to use the pens below.
Here are some cards I made with Blender Pens in a variety of ways.
First up is the easiest way to use the pens. I stamped the images in Stampin' Up! classic ink, which is water-based. I then used the Blender pens to spread the ink that had been stamped onto the paper. In this case I stamped flowers, so I used the pens to smear the ink in the petal and leaves, I worked carefully on the flower petals to blend from the flower center outward, so the petals are darker in the center and get lighter going outward. Color your images right after stamping so that the ink is not too dry to blend. This method gives a very light and softly colored look.
This next method used the Blender Pens much like a marker, but you pull ink from the lid of your ink pad, or from a pallet made with your ink refills, and then apply it to your image. First stamp your image in Black, then apply your color with the Blender Pens.
Why not just use a marker you say? Well a marker is a solid color, but with a Blender pen you can get darks and lights. Notice the flowers on the sample. The flower centers are a darker blue that gets lighter to the edges of the petals. If I had used a standard marker I could only get one color value. I show this in detain in the video above. Yes you can get different color values with Stampin' Blends Alcohol markers but the big difference is you can use the Blender Pens with any color but with Stampin' Blends Alcohol markers you need to buy each color and shade separately, wereas I was able to get several shades of navy with just one Blender Pen and my Night of Navy ink pad.
This last version used Watercolor Colored Pencils to get the color. I stamped the images in Black ink, then colored them in using Stampin' Up! Watercolor Colored Pencils. Using the Blender Pens on top of the already colored in images softens your coloring, getting rid of any harsh pencil lines. When blending be careful not to blend out your darks and lights, but if you do, you can apply more pencil on top. You can also blend multiple colors of pencil together to get nice ombre effects. One thing to look out for is paper pilling if you go over an area too much. Cheaper paper will pill faster, or any paper if you go over one area too much. Have a little coloring party and just try it out a few times for fun before coloring your final image. Blender Pens give a very pretty effect and can be really enjoyable to work with.
Another Scrapbook page! Actually a two-page spread! I'm on a roll!
These pages don't use special techniques or even products that you can still order, so I almost didn't share it! But they do use a couple of my favorite scrapbook items, I would even say my go to items, so I felt I should share these pages anyway.
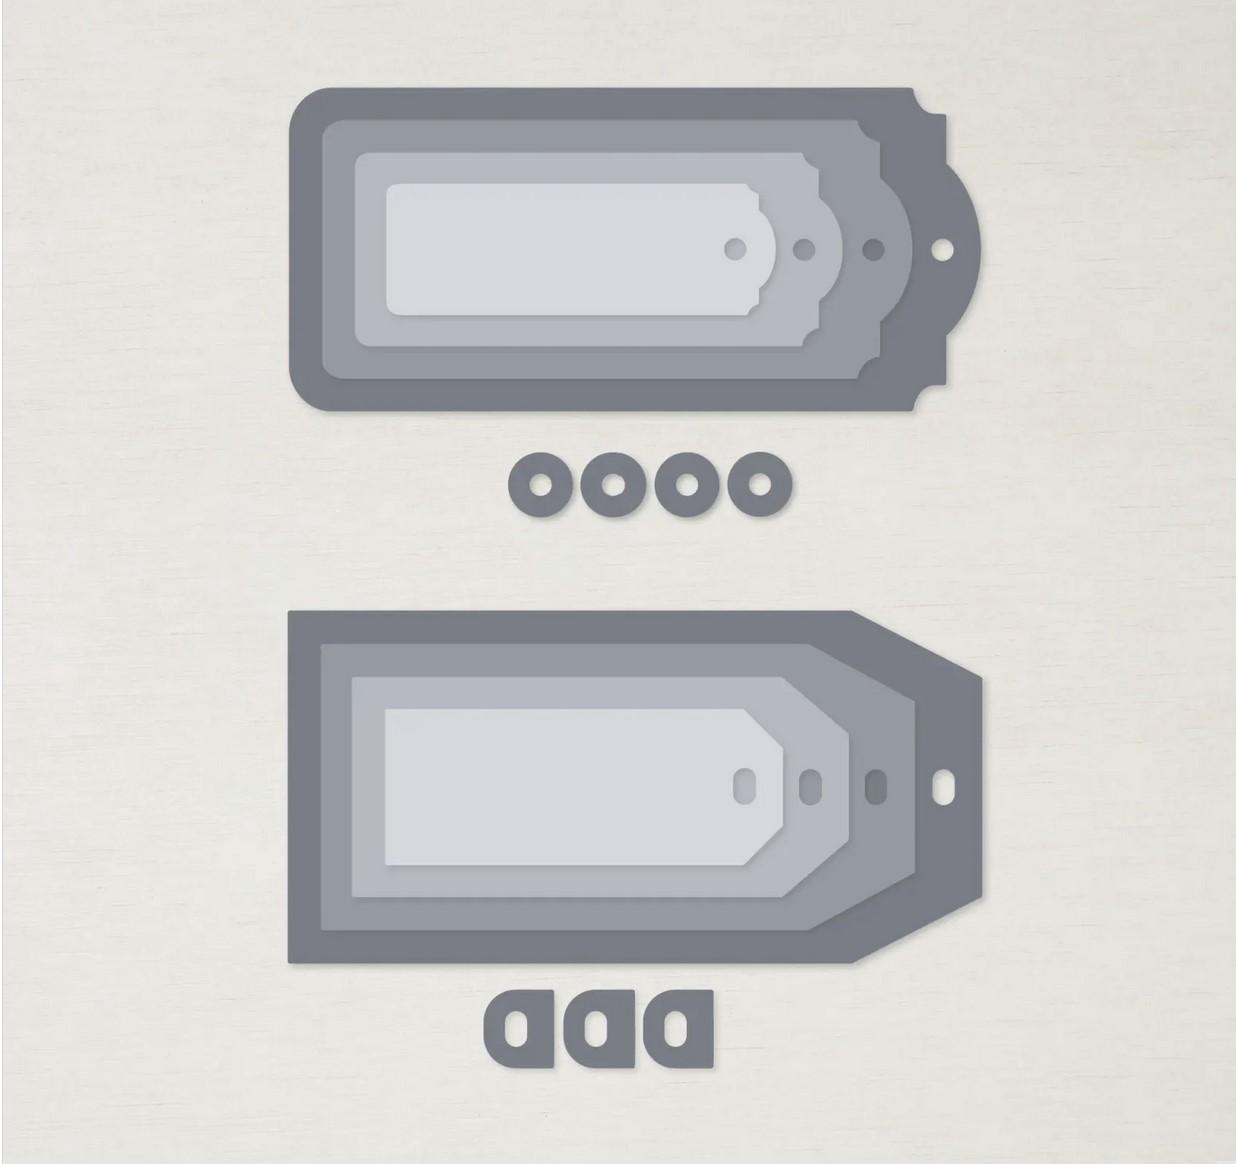
The 'Scrapbook Essential' items for me are the Tailor Made Tags dies, and Alphabet stamps and dies.
I use the tag dies all the time on scrapbook pages, they are great for titles, as I used the die for on this page. You can also use the tags for journaling or page decorations. They are so useful!!
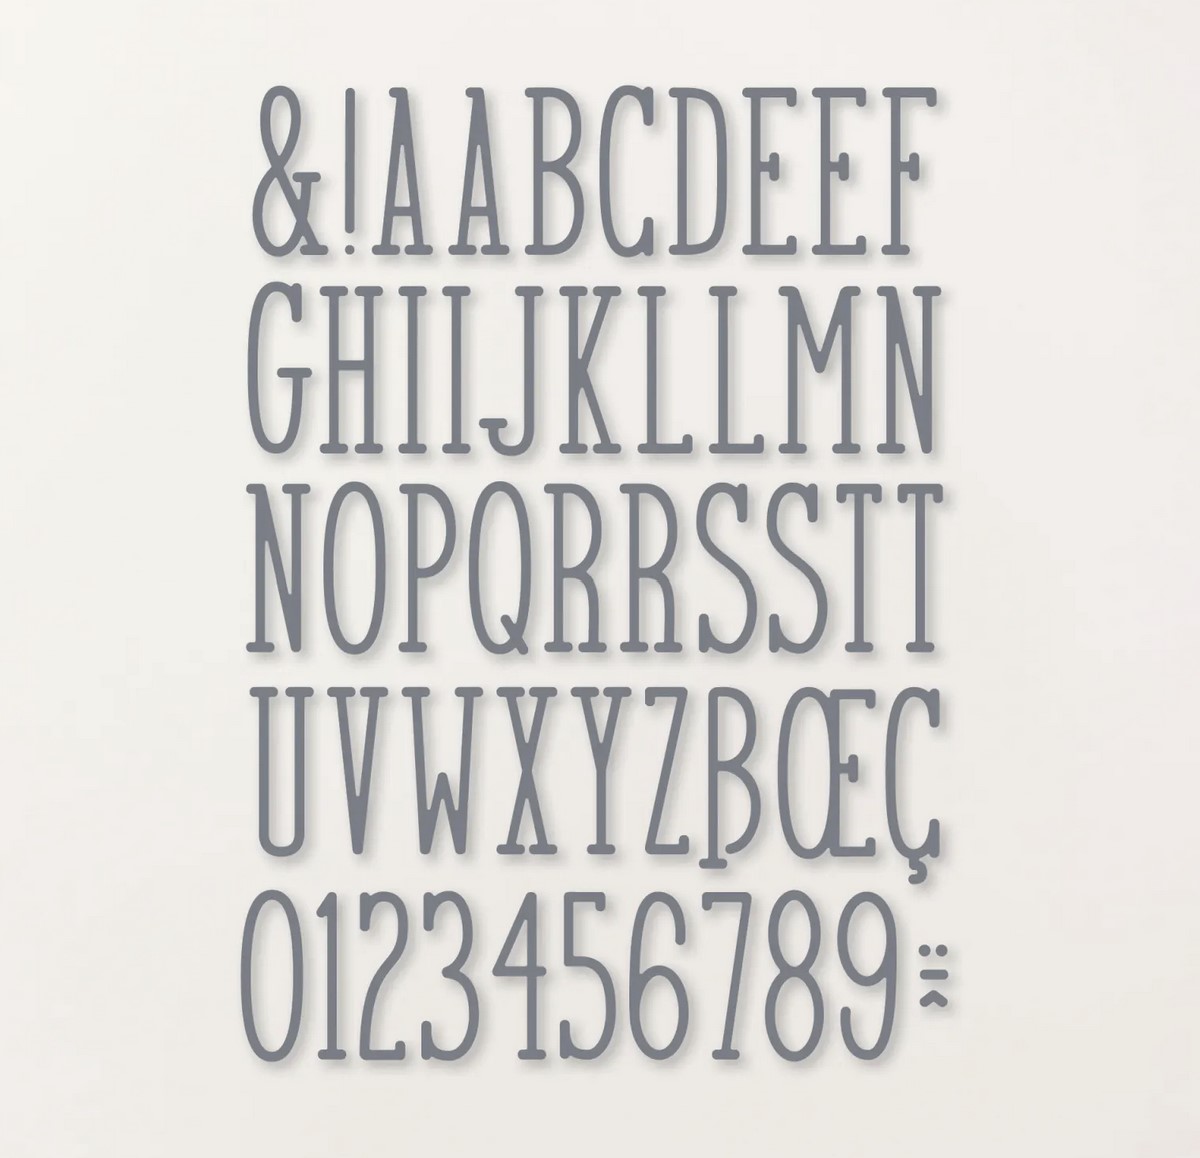
Alphabet dies are also great for titles. On this page I used the Alphabet A La Mode dies. These are a great size because they are tall, but thin. The thin part is great because you can spell out more words on a card. In the past I have had letter dies that were thicker and could only fit 4 letters across a card, spelling out things like "love" or HB2U for Happy Birthday to you. These newer dies allow for more letters to fit across a card, and of course a scrapbook page. Here are a couple samples from the catalog.
I also tend to purchase all the alphabet stamps. Currently there are two different alphabet stamps available. Alphabest, which I used on my page for the word 'the'. I added some catalog samples under the stamp sets so that you can get an idea on their size.
And the Classic Letters stamp set.
These pages are from a trip to "The Farm" in Sturgeon Bay Wisc. Our family goes there often while on vacation and we have been going there for years. I love to see the family posed with the scarecrow, same scarecrow but my family grows and the kids keep getting bigger :)
The Designer Series Paper that I used for these pages was a pack that was Free with Purchase during Sale-a-Bration, so unfortunately it is no longer available, however Stampin' Up! has so many fantastic papers that I am sure you will find one to fit your needs.


")
")


 Designer Series Paper")
 Designer Series Paper")


.jpg)


")


")