Hi Stampin' Friends! Recently I needed a treat holder for my Stamp Camp, we always make 4 cards and a treat holder, and I was in a hurry. My week had totally gotten away from me and I was short on time. I remembered the Diaper Fold Treat holder that I hadn't made in YEARS! I wondered if I would still like it after all this time and guess what? I did! This is an oldie but a goodie. So simple to make, no crazy scoring and gluing. This is something everyone need to know how to make. These are perfect to put at a place setting at a baby shower, bridal shower, teacher appreciation, work luncheon, you name it!
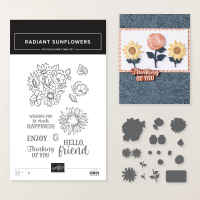
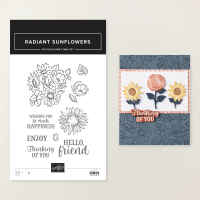
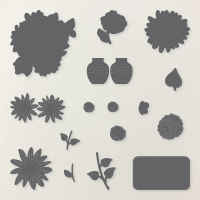
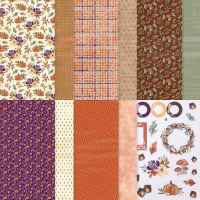
You can change up the papers and embellishments to fit any occasion. For Stamp Camp I choose to use the Autumn Opulence Designer Series Paper. This is a pretty paper for fall and I happened to find some fun new chocolates in co-ordinating colors! Yay! Here is a quick video that shows how to fold this treat holder. And when I say quick, I mean quick! I folded it in a minute, then a few seconds more to add the embellishments. Speaking of embellishments, for these projects I used the Radiant Sunflowers bundle. This is a great stamp bundle for fall, but really sunflowers are pretty all year long. There is a whole suite of products that coordinates together with papers, stamps, dies, ribbons and more.
I have a slightly longer video if you would like to see this a little slower and with the embellishments being added. You can check it out on my YouTube Channel here: See the entire Sunflower Fields Suite here:
Hi Stamping friends!! Today I played with the new All Aflutter stamp set with coordinating paper punch. I love a stamp and punch bundle! So fun! This new bundle comes out on May 5th, along with a bunch of other new fun things!!
I picked colors right out of the Beautiful Ordinary Life Designer Series Paper. This paper is so pretty with soft pastels in watercolor washes of patterns on one side, and bold black and white patterns on the other.
I chose to use Pool Party, Flirty Flamingo, and Daffodil Delight for my butterflies.
I created the frame with the Stylish Shapes dies. There are 5 sizes of squares. I used the largest square and the middle sized square to create the frame. I flipped the center cut out over and used the black and white side on the inside of the frame. I used Dimensional Adhesive strips to pop the frame out a bit.
The sentiments are stamped in Versamark on Basic Black cardstock, then heat embossed with white embossing powder.
I added some Bakers Twine bows in black on the white card base and white on the black card base. I also added some fun enamel dots called 'Array of Dots'.
I couldn't decide on a card base color. I almost choose Pool Party, but then decided on Black or White. I still couldn't choose so I made one of each. I still am not sure which one I like better!
Let me know which one you like better in the comments on my Video!
These products are part of the next catalog which comes out on May 5th. I will have links to the catalog here on May 5th so be sure to check back!
The Cake Day stamp set and dies has just been added to the Last Chance List! That means that it is retiring and now only available 'while supplies last'. I think this set is super cute, so I thought I would share some of the cards I made with it.
We made this cute Cake Shaped card at Stamp Camp a few months back. When I made this card, I also cut out a ton of various pieces from the die set from some scraps I had on my desk. I like to do this with sets, if I am gong to have it out and cutting one, I may as well cut more, right?
The dies for this set are really fun. Notice that the cake slice is a card all by itself! It has a score down the middle so you can use it as is, or cut it for a simpler single sided cake slice.
Here I've used just the candles and the Make a Wish stamp!
For this card, I focused on the Macarons!
My daughter and I made Macarons a few times while at home during Covid. They didn't look great, but they sure tasted great! Making these cards made we want to give it another try! These were chocolate and raspberry.
For the card below I used the the folded cake, but I mounted it on a flat full size card base.
The cake slice still opens up!
For this card I just used half the cake and mounted it onto a fully opening card base.
I kept my cards pretty simple, but you can just go crazy and add all sorts of elements. Take a look at this sample from Stampin' Up!
Here is a video where I show all the different dies and elements to this really fun set.
The Cake Day stamps and dies are only available for a limited time, while supplies last, do don't wait too long!
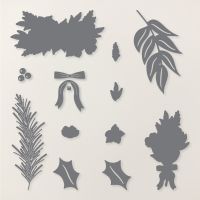
I really love the dies in the Christmas Greenery bundle. The large sizes really make a statement and will be fun to use on some scrapbook pages as well. This card is actually a copy of one straight out of the catalog. I thought it looked really pretty and so I copied it almost exactly. In the end, seeing it in real life, it is even prettier. I don't often do a white base card, but I am glad that I did because it looks great and really lets the die cuts be the starts of the show.
The stamped floral in the very back of the card gives a nice anchor for all the die cuts layered on top. I stamped the floral image in pool party so that the image shows in the top left and bottom right corners. The stamp is larger, so they do overlap in the middle, but that's OK because it will be covered with the strip of designer paper.
The greenery is cut from Secret Sea, Old Olive, Gold Foil and Secret Sea Glitter paper, which is just gorgeous in person!!
That little die cut bow is darling. It cuts on one die in three pieces, which I glued together. The fact that it is in three pieces may seem unnecessary but stacking and gluing them really gives it so much more dimension and it really is cute. I also added some red shimmer with the glitter dots.
I have a full how to video for this card on my YouTube Channel below.
As I mentioned, this is a copy from a photo in the catalog, so I couldn't see how the inside looked. I decided that since the base is white I wanted to bring a little more to the inside. I created a layered area for a written message by layering some Real Red and Basic White, and brought some more of the die cuts from the Christmas Greenery dies inside. I also added some gold foil so the inside is just as elegant as the outside.
I was just looking at the Stampin' Up! online store and the Christmas Greenery bundle is on Back-order, but it is scheduled to be back in-stock next week, so not too long. Did you know that if you log into the site and click on a back-ordered item, you can ask for an email to let you know when it is back in stock! That's great so you don't miss it again, because I think there is a possibility that it will sell out again. It will look like this, except of course with your email address :)
Have you heard about Stampin' Up!'s new Craft Classes? They are a super fun virtual class focused around a product line. So far there are two different classes available. One is focused around this Traditions of Christmas suite of products. I took the class and found it really well done. Before class started I pre-cut all my cardstock and die pieces per the instructions. Then I poured myself a coffee and grabbed some snacks and settled in for a fun craft time. The class makes 4 projects, 3 cards and 1 home decor project. The video is almost three hours, so I decided to break it into two chunks of 2 projects each. The instructors were the designers of the products so it was really interesting to hear them talk about the thoughts behind the pieces. The instructors gave some great tips and techniques for using the dies and stamps and I learned a lot.
I'm not sure if I am allowed to show the full projects but this is a sneak peek at them from the website image. They were all gorgeous and I will use the home decor piece this Christmas and many more. During the video one of the instructors was making the projects as the instructions said, while another was making them slightly different, so you could see other versions. I really liked that. Also, the class is in a private facebook group, and people were sharing some of their alternative projects using other colors or other papers if they didn't have the exact products used in the class. The class was $30 and I thought is was worth it. I did already have all the needed products though. Keep an eye out for future Craft Classes. There is a new one just announced using a different suite of products. You can see it in the online store here.