Hi Crafty Friends. Today I am using the Jolly Holly bundle. I really wanted to give the Hybrid Embossing folder a try. The embossing folder and coordinating dies can be used at the same time to cut out the main holly images. The holly doesn't completely detach from the cardstock, so you can fluff up the leaves to get a really nice 3D effect. You can also use the embossing folder without the die cut, or use it with the die cut but then detach the holly by just snipping the little piece that is attached to the cardstock and then use the holly on all sorts of projects.
The sentiments included in this set are really nice too. I like that there is a scripty version and a printed version of the Merry, Happy and Christmas so you can mix your fonts or use different colors.
I made my card almost like the one shown in the online store. I really like how the holly hugs the sentiment card. Every time I made a card, the holly landed slightly differently, so I just adjusted which holly leaves to bring in front and which to keep behind.
I made a quick video with some tips and tricks on how to use this bundle. You can see it here on my YouTube channel.
Here is the sample from the Online store. It looks so pretty in Cloud Cover, I wouldn't have thought to use that color.
Here is another example where they used the embossing folder without the die cuts. A water painter and ink was used to color in the holly leaves.
Hello crafty friends! Today I want to share one of the cards that I will have available at Card Buffet next week. I used the A Little Cheer stamp set and punch bundle. I love a punch, they make crafting so simple and quick. The little holiday images are so cute and I can see many uses for them. They would be fun in a shaker card or the little images can be hung on the stamped line, or a real one, like garland. I just thought of those as I was typing up this post, and now I really want to go and make them!
Here's a look at the inside of the card. This set has some really nice sentiments to mix and match.
I made a quick video with some tips on making this card and some tips on how to line up the punched images in the squares.
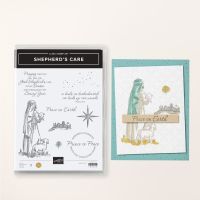
Hi everyone! Today I am sharing a card I made with the Shepherd's Care stamp set from the new September to December Mini Catalog from Stampin' Up! I wanted to make it look like the star was shining it's light down on the shepherd. I think I did it!
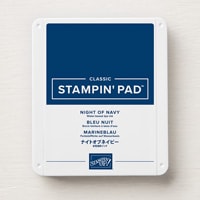
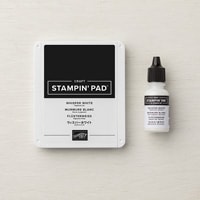
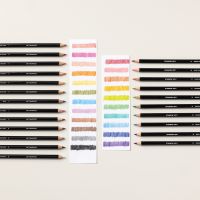
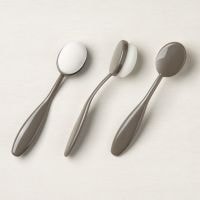
I started by stamping the image onto Basic Gray cardstock. I then masked off an area for the light, and used Blending Brushes to add Night of Navy ink for the sky. Next I used Craft White to stamp the star, and a White Watercolor pencil to add highlights to the shepherd.
I decided to make the glow a little warmer by adding some Daffodil Delight watercolor pencil on top of the white. It is important to add the white first, to help the light yellow pigment to show up on the dark cardstock.
I finished the inside with a sentiment and the smaller image of Bethlehem. You can see a full how to video of this card on my YouTube Channel.


![Jolly Holly Bundle (English) [ 166120 ]](https://assets1.tamsnetwork.com/images/EC042017NF/166120s.jpg "Jolly Holly Bundle (English) [ 166120 ]")
![Jolly Holly Hybrid Embossing Folder [ 166119 ]](https://assets1.tamsnetwork.com/images/EC042017NF/166119s.jpg "Jolly Holly Hybrid Embossing Folder [ 166119 ]")
![Jolly Holly Photopolymer Stamp Set (English) [ 166117 ]](https://assets1.tamsnetwork.com/images/EC042017NF/166117s.jpg "Jolly Holly Photopolymer Stamp Set (English) [ 166117 ]")
![Shaded Spruce 8-1/2" X 11" Cardstock [ 146981 ]](https://assets1.tamsnetwork.com/images/EC042017NF/146981s.jpg "Shaded Spruce 8-1/2\" X 11\" Cardstock [ 146981 ]")
![Shaded Spruce Classic Stampin' Pad [ 147088 ]](https://assets1.tamsnetwork.com/images/EC042017NF/147088s.jpg "Shaded Spruce Classic Stampin' Pad [ 147088 ]")
![Soft Sea Foam 8-1/2" X 11" Cardstock [ 146988 ]](https://assets1.tamsnetwork.com/images/EC042017NF/146988s.jpg "Soft Sea Foam 8-1/2\" X 11\" Cardstock [ 146988 ]")
![Poppy Parade Classic Stampin' Pad [ 147050 ]](https://assets1.tamsnetwork.com/images/EC042017NF/147050s.jpg "Poppy Parade Classic Stampin' Pad [ 147050 ]")
![Poppy Parade Stampin' Blends Combo Pack [ 154958 ]](https://assets1.tamsnetwork.com/images/EC042017NF/154958s.jpg "Poppy Parade Stampin' Blends Combo Pack [ 154958 ]")
![Clear Wink Of Stella Glitter Brush [ 141897 ]](https://assets1.tamsnetwork.com/images/EC042017NF/141897s.jpg "Clear Wink Of Stella Glitter Brush [ 141897 ]")
![Shaded Spruce & Soft Sea Foam 1/2" (1.3 Cm) Ribbon [ 165234 ]](https://assets1.tamsnetwork.com/images/EC042017NF/165234s.jpg "Shaded Spruce & Soft Sea Foam 1/2\" (1.3 Cm) Ribbon [ 165234 ]")
![Black & White & Gold Baker's Twine [ 166005 ]](https://assets1.tamsnetwork.com/images/EC042017NF/166005s.jpg "Black & White & Gold Baker's Twine [ 166005 ]")


![A Little Cheer Bundle (English) [ 166124 ]](https://assets1.tamsnetwork.com/images/EC042017NF/166124s.jpg "A Little Cheer Bundle (English) [ 166124 ]")
![A Little Cheer Mini Punch Pack [ 166123 ]](https://assets1.tamsnetwork.com/images/EC042017NF/166123s.jpg "A Little Cheer Mini Punch Pack [ 166123 ]")
![A Little Cheer Photopolymer Stamp Set (English) [ 166121 ]](https://assets1.tamsnetwork.com/images/EC042017NF/166121s.jpg "A Little Cheer Photopolymer Stamp Set (English) [ 166121 ]")
![Old Olive 8-1/2" X 11" Cardstock [ 100702 ]](https://assets1.tamsnetwork.com/images/EC042017NF/100702s.jpg "Old Olive 8-1/2\" X 11\" Cardstock [ 100702 ]")
![Cherry Cobbler 8-1/2" X 11" Cardstock [ 119685 ]](https://assets1.tamsnetwork.com/images/EC042017NF/119685s.jpg "Cherry Cobbler 8-1/2\" X 11\" Cardstock [ 119685 ]")
![Old Olive Classic Stampin' Pad [ 147090 ]](https://assets1.tamsnetwork.com/images/EC042017NF/147090s.jpg "Old Olive Classic Stampin' Pad [ 147090 ]")
![Cherry Cobbler Classic Stampin' Pad [ 147083 ]](https://assets1.tamsnetwork.com/images/EC042017NF/147083s.jpg "Cherry Cobbler Classic Stampin' Pad [ 147083 ]")
![Basic White 8 1/2" X 11" Cardstock [ 166780 ]](https://assets1.tamsnetwork.com/images/EC042017NF/166780s.jpg "Basic White 8 1/2\" X 11\" Cardstock [ 166780 ]")
![Rhinestone Basic Jewels [ 144220 ]](https://assets1.tamsnetwork.com/images/EC042017NF/144220s.jpg "Rhinestone Basic Jewels [ 144220 ]")