Showing posts with label Watercolor. Show all posts

Thursday, September 3, 2026

Under My Wing stamp set

 Hi Stampin' Friends! Today I want to share a card I made for a swap. I recently traveled to Michigan for a super fun demonstrator event and part of the event was a Shoebox Swap. If you have never heard of a Shoebox Swap, let me tell you what that is.  Each person makes a finished card, and then makes up kits with all the pieces needed to recreate the card. We put it all in a shoebox type box with the inks, stamps and everything. Then we pass the boxes around the table so we each get to make one of each others cards. Fun! Here is the card that I brought.


 This is the new Under My Wing stamp set.  It is part of the September Online Exclusives Release. You can see the Online Exclusives here.   I loved this stamp set right away because I love birds and I love to color. This set fits both of those loves!! I decided to watercolor my first card with the set. I used Crumb Cake, Calypso Coral, and Old Olive inks. See my full how to tutorial on YouTube for tips and tricks. 


I kept the inside simple with a nice Thank you note.  The Designer Papers I used for this card are from the Brushed With Beauty Designer Series Paper collection.  
 

I am sure I will try this stamp out with other colors and mediums. Next up I think watercolor pencils! 


Product List

Friday, March 14, 2025

St. Patrick's Day card


 OK, there are no stamps here, but I wanted to share it anyway.  This card is a fun one and it uses Watercolors.  I did mount the image onto my Garden Green Cardstock from Stampin' Up! :) 

Some of you know that I teach a watercolor class at my local Park District and we painted a clover field last week.  I usually make a mini version of the painting too.  Sometimes people finish early and the mini version is a fun way to get a little more practice in. I thought I would share it since my Stampin' friends are also creative people and might like ti give it a try.  You can paint it with some of you Stampin' Inks, or if you have some watercolors, you can use those too.  

 Here is a little How to video: 


Let me know in the video comments if you give it a try! 


Wednesday, November 6, 2024

New Watercolor kit from Stampin' Up!


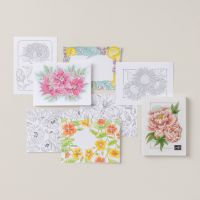
Take a look at the new Nature's Paintings Kit! I just love this kit.  If you are a follower of my blog or Facebook page, you know that I love all things Watercolor.  We were given a sneak peek of this kit back in early October and I have been eagerly awaiting it's release ever since. 

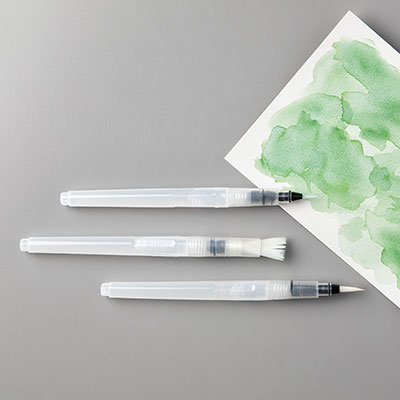
This kit is a Watercolor Coloring Book.  The images are printed on Watercolor paper so you can color the images with the INCLUDED Watercolor pencils!  You also get a Water Painter!  There are 24 pages, 2 each of 12 designs.  Once you have colored the images, you can take them out of the book and frame them or add them to a card base and make a card. 

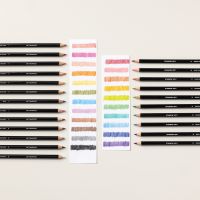
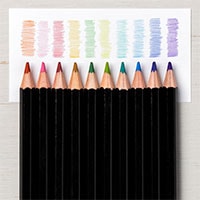
Now let's talk about those Watercolor Pencils.  I love the Watercolor Pencils from Stampin' Up! and you can purchase them separately in two different sets.  This kit will allow you to play around with them and see if perhaps you want to get another set.  Some of the colors in the kit are in Assortment 1 and some Assortment II so if you were to purchase more, you would get some duplicates, but they are not very expensive and the don't dry out or go bad and you will use them eventually.  The kit does contain a NEW color to the pencil line up, Berry Burst.  Berry Burst is not in either assortment, so I am happy to get that! 

The kit includes Daffodil Delight, Coastal Cabana, Pumpkin Pie, Flirty Flamingo, Berry Burst, Early Espresso and Garden Green. 

I love love love this kit! When mine comes in, I will make a video about it and show some techniques with the pencils,


If you would like to see some videos about the pencils that I have made in the past, here is a good one.


Product List

Saturday, June 8, 2024

Penciled Pear watercolored two ways


Hi stamping friends! I am playing around with the Penciled Pear stamp set.  I am part of a group of demonstrators who do a big card swap with new stamp sets from the Annual Catalog.  We each choose a different stamp set so that we end up with a large variety to share with our customers.  I choose Penciled Pear because I love the sketchy look to the images. My usual go to with stamp sets like this is to stamp on Crumb Cake and add some white pencil to look like a charcoal sketch. I take a drawing class and my favorite medium in that class is charcoal. This time I wanted more color, so I stamped in Versamark and embossed with Black Embossing Powder.  Then I had to decide how to color the image. I LOVE watercolor, so that was my first choice. Now I had to decide to use either Watercolor Pencil or Ink. Decisions decisions!  So hard to choose! In the end I went with BOTH!  In the photo above can you tell which is which?


On this card I used ink and a Water Brush to color the image. The pear is embossed with Black Embossing Powder and I used Old Olive, Daffodil Delight and Poppy Parade to color it in.  I worked quickly to get a simple look. 

The background paper is from the Nature's Sweetness Designer Series Paper Pack, set onto Pebbled Path Cardstock.

I cut a circle with the Deckled Circles Dies, clipping off just a little from the right hand side. 

Basic Beige Bordered Ribbon is looped around the card and tied with Linen Thread. I have a hack for this in my video at the 23 Minute Mark, check it out.  I know, long video but I didn't know what to cut out!


This next card is the same but colored with Stampin' Up! Watercolor Pencils. 

The actual sentiment stamp reads "Thanks for being You".  To ink just the 'thanks' sentiment, I used my Basic Black Stampin' Write Market to highlight just the parts of the sentiment I wanted.  I used the rest of the sentiment on the inside.  Below is a photo from the inside of the card. 

On the inside I used Very Vanilla Cardsock. You can watercolor on Basic Vanilla Cardstock to paint, but only if the water is minimal and you work lightly and quickly.


 Here is a full length video. I hope you will check it out.  I offer some tips on watercolor, as well as using markers to ink up only portions of the image, and a ribbon hack too!  Be sure to leave a comment on your favorite watercolor method, and like and subscribe. :) My children told me I am supposed to ask for that to gain more views. We are doing a bit of an experiment :) 


Here are all the supplies used for this card.

Product List

Saturday, November 18, 2023

Joy of Noel Stamp

 I finally made my first Christmas card of the season!  And of course I had to watercolor it!  I used the Joy of Noel stamp set and made several versions in Real Red and Shaded Spruce.


I started by embossing the main image with gold embossing powder.  Then I messy painted the Shaded spruce over the image, avoiding the red berry areas. 

Once dry I went back in and re-painted the leaves and holly to darken just those areas. I then painted the red berries. 

I embossed the Joyous Sentiment with gold embossing powder as well. 


For this second version I embossed the image and sentiment in black embossing powder.  I colored the image the same way as the Shaded Spruce card. 

For this version I added some die cuts from the Joy Of Noel die set in gold foil and shaded spruce. 

On this version I repeatedly stamped one of the background images on a scrap of watercolor paper and then spritzed it with water to smudge it a bit.  


I have a full length video for these cards on my YouTube channel.


which color do you think looks best?


Product List